Step 2 - Write Your Work Experience
Add work history entries, write achievement-focused bullet points, and structure your experience section so recruiters and ATS scanners understand your impact.
Last updated 2026-08-19
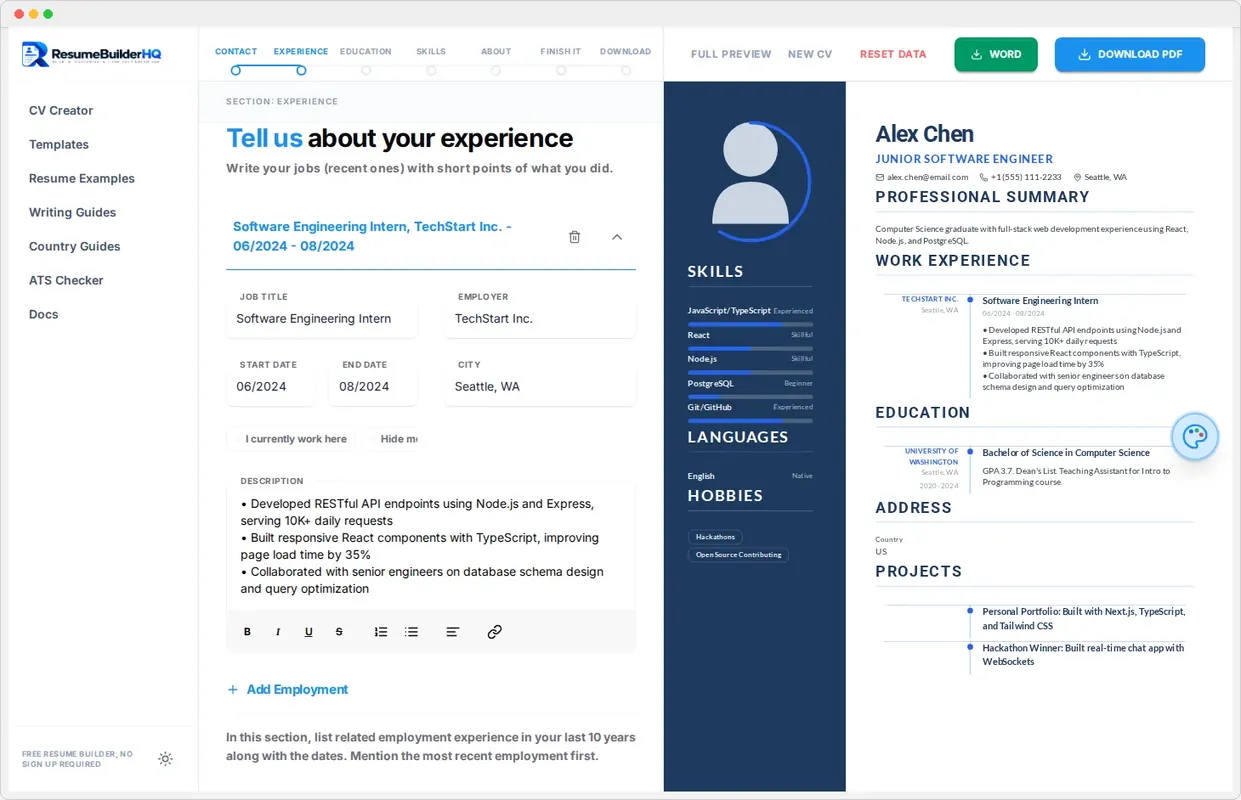
The Experience step holds your work history. This is usually the section recruiters read first, so it deserves the most attention. A strong experience section shows what you achieved, not just what you were hired to do.
How to add a position
Click Add in the Experience panel to create a new entry. Then fill in these fields:
- Company - the organization you worked for.
- Job Title - your role at that company.
- Dates - start and end dates using the month/year picker.
- Location - city and country, or a remote label if needed.
Write achievement-focused bullets
The bullet points under each role are where you shine. Write them as achievements rather than duties. Lead with a strong action verb and add a measurable result when you can.
Tip
The built-in rich text editor lets you format your bullets. Use bold for important numbers or keywords, and keep each bullet to one clear sentence or two.
Add and remove roles
Add every role that matters for your target job. Recent, relevant experience beats a long list of old jobs. If a role is unrelated or many years old, you can leave it out.
Use the remove button on each entry to delete it. Changes update the preview instantly.
Reorder your experience
The order of your roles matters. Most resumes list the most recent role first, but you can drag entries around in the preview to lead with your most relevant position. This is useful for career changes.
Continue to Education
When your experience section reads well, click Continue to move to Step 3: Education. You can always return to this step from the wizard.