Step 1 - Add Your Contact Information
Enter your name, job title, phone, email, location, photo, and social links in the Contact step. Set date formatting to match your country.
Last updated 2026-08-19
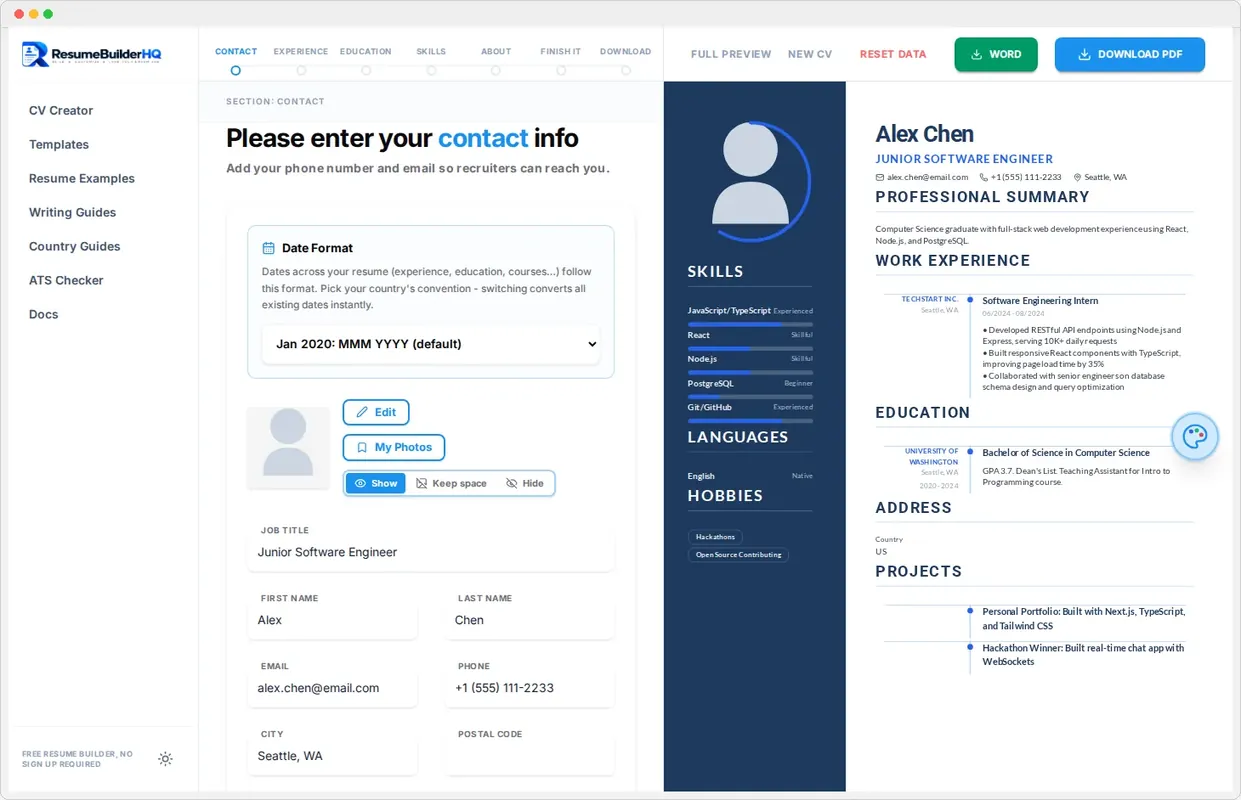
The Contact step is where your resume begins. This is the first of seven steps in the wizard. It collects the personal details that appear at the top of your resume.
Your name and job title
Start with your full name and a short job title. The job title is the headline phrase under your name, like "Product Designer" or "Registered Nurse". Use the job title you are applying for, not just your current role.
The job title is one of the first things recruiters and ATS systems notice. Match it closely to the role you want to make your resume more relevant.
Contact details
Add the ways recruiters can reach you:
- Email - use a professional address that includes your name.
- Phone - include your country code if you are applying abroad.
- Location - city, region, or country, depending on local resume conventions.
Date format
Choose the date format that matches your target country. The US style is MM/YYYY, while many countries use DD/MM/YYYY or MM.YYYY. Picking the right format keeps your experience dates readable and correct.
Your profile photo
Add a professional headshot to make your resume more memorable. The photo shows on the preview and prints on your PDF. You can hide the photo, keep a placeholder box, or remove it entirely from the Design & Customize rail.
Tip
Social and website links
Open the Social Profiles section to add links to LinkedIn, GitHub, Behance, or a personal website. Every link you add appears as an icon on your resume. Only add links that are professional and current.
Continue to the next step
When your contact details look right, click Continue to move to Step 2: Experience. You can come back to this step at any time by clicking Contact in the wizard.